Sanding an Old House: Why Abrasives Meet Resistance in Older Materials
Share
You press a fresh sheet of sandpaper against trim that has been painted perhaps a dozen times since the house was young, and the paper skates, gums, or polishes the surface instead of cutting it. Meanwhile, the same grit that failed there bites aggressively into a modern board or a patch of new drywall compound. The abrasive isn't defective. The building is simply made of different stuff than the product was pitched against, and old houses announce that difference through the sandpaper.
Abrasives are a removal system, not a universal smoother. They work by scratching away material with hard mineral grains, and how well that happens depends on the hardness of the coating, the substrate beneath it, the pressure applied, the tool speed, and whether the removed material clogs the spaces between grains. In an older home, the coating stack, the wood species, the gypsum or plaster, and the hidden hazards all change those variables. Sandpaper choice is therefore less a matter of buying the right grit and more a matter of reading what the surface is actually made of before committing to removal.
What an abrasive is actually doing
Every sanding operation is progressive scratching. Coarser grits cut deeper grooves; finer grits cut shallower ones. Finishing works because you move through a sequence that replaces deeper scratches with shallower ones until the remaining pattern is fine enough for the coating you intend to apply. That principle holds across wood, drywall compound, and filler. What changes is the material's response: soft or gummy coatings load the paper, hard coatings polish and resist cutting, and friable surfaces crumble and dust instead of shaving cleanly.
The useful question is not which grit number is best but which abrasive, backing, and tool match this coating on this substrate. That question gets harder in an old house because the surface you see is usually a stack of unknowns—original finish, old paint, repair patches, and sometimes a harder or softer layer than you expect.
Why old coating systems fight back
Paint and varnish harden over time. Solvents leave, crosslinking continues in some chemistries, and the film becomes denser and more resistant to cutting. A paper that cuts eagerly into fresh latex may barely scratch a decades-old alkyd or varnish film. Pressing harder generates heat, and heat softens many coatings so they smear and load the abrasive rather than turning to dust. The paper then glazes over, and the user presses harder still. That cycle damages the surface and wastes abrasives.
Layer count matters too. Where trim has many coats, the outer film may be sound while the buildup beneath has cracked, checked, or lost adhesion. Sanding a thick stack can open up old checking and reveal that the coating was a cosmetic shell over failing layers. In that situation, the honest repair is often to remove the finish down to stable material rather than to feather the surface smooth and paint over it. Stripping may be more appropriate than sanding, but chemical strippers bring their own ventilation, skin, and disposal considerations, and some old finishes and paints may contain hazardous materials.
When sanding is the wrong removal method
If a coating is thick, cracked, or failing in layers, or if it may contain lead, abrasive removal is not a casual choice. Ordinary sanding of lead-based paint creates contaminated dust that spreads far beyond the work area. The same caution applies to old plaster, textured coatings, and insulation that might contain asbestos, and to silica-bearing materials. Age alone does not prove a material is hazardous, but unknown materials deserve testing or professional advice before you grind them into airborne dust. Do not rely on a standard dust mask as universal protection; choose controls according to the actual hazard.
The substrate decides how the paper behaves
Old wood is not just older modern wood. Species differ in hardness, grain direction changes cutting resistance, and reclaimed or long-service boards may have silica grit embedded in the surface or old finish sunk into the pores. Sanding across the grain leaves cross-grain scratches that show under a clear finish even after finer passes. Working with the grain and progressing through grits reduces that damage.
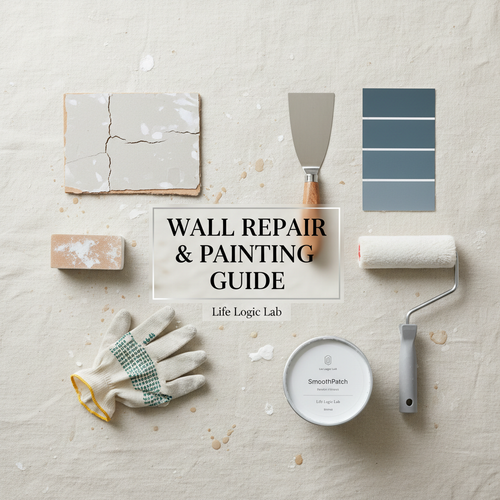
Plaster walls behave differently from modern drywall. Traditional plaster is a hard, dense surface over a base coat, while modern drywall paper and gypsum core are softer and more easily torn. Aggressive sanding can fuzz drywall paper or gouge plaster, and either result shows through paint. For small drywall dings, a fine abrasive or a damp sponge may be sufficient; larger repairs often call for a patching compound applied in thin layers and sanded lightly after it hardens. A drywall repair kit can supply patching materials for such repairs, though the key variable is still how thin you apply each layer and how fully it dries.
Matching abrasive, tool, and task
Hand sanding gives control: low heat, even pressure, and good feedback through the paper. It is slow, but it is often the right method for trim profiles, small patches, and surfaces where an aggressive tool would round over edges. Power sanding removes material faster, but speed and pressure generate heat, and heat is the enemy of many coatings and finishes. An orbital sander on a gummy finish can clog, smear, and leave a swirled surface that takes extra work to correct.
Grit progression should follow the work, not a ritual. Remove damaged material at a coarser grade, then step finer to refine the scratch pattern to suit the next coating. Jumping straight to a very fine grit on a rough surface is like trying to erase a deep scratch with a pencil eraser: slow, and it leaves the scratch behind. Equally, going finer than the finish requires is wasted effort. The right stopping point depends on the coating, the desired appearance, and the material.
Abrasives for shaping and filling
Fillers and patch compounds are softer and more friable than wood or cured finish, so they sand quickly and can be over-sanded into hollows. The practical rule is to apply thin layers, let them harden fully, and use a fine abrasive with light pressure to bring the patch level with the surrounding surface. A wood filler is appropriate for cosmetic wood defects, not for restoring structural strength or for covering active moisture. Filler used where wood is soft or damp will fail, however neat the sanded patch looks.
Furniture projects in older homes often raise the same question on a smaller scale. A furniture scratch repair kit may address a cosmetic scratch without aggressive sanding, which is useful when the surrounding finish is aged and hard to match. Where the finish itself needs refreshing rather than structural repair, a coating such as all-in-one furniture paint or chalk paint may be an option, but surface preparation and compatibility still control the outcome. Sanding is often part of that preparation, and the same coating-hardness questions apply.
Dust, safety, and honest project boundaries
Sanding produces dust in proportion to removal, and fine dust stays airborne. Eye protection and appropriate respiratory protection matter where the material is dusty, but protective equipment does not make disturbing a hazardous material acceptable. Where the coating or substrate is unknown, stop and test or seek professional advice before sanding. This is one of the few areas where a small amount of caution buys a great deal of peace of mind.
Keep a few practical rules in mind. A pair of safety glasses is basic protection against debris, and a N95 respirator mask can reduce inhalation of ordinary nuisance dust when that is the actual hazard, but it is not universal protection against fumes or hazardous fibers. Gloves help with handling and cleanup, though they are not a substitute for safe tool handling. None of this equipment removes the need to identify what you are sanding.
A decision path for older surfaces
Before sanding, identify what you can: is the surface wood, plaster, drywall, or masonry? Is the coating hard and intact, or soft, cracked, and layered? Does the area show moisture damage, softness, or movement? If the material is unknown and predates modern product regulations, treat it cautiously and consider testing. Choose a removal method that matches the finding—hand sanding for control, scraping or stripping where the coating stack is failing, patching and light sanding for cosmetic defects, and professional assessment where moisture, structural movement, or hazardous materials are involved.
The irony of old houses is that their materials often demand more patience and less force than newer ones. Sandpaper responds to that. Used thoughtfully, it tells you when a surface is sound and when it is hiding a bigger problem beneath the paint.